
Why Proper Removal and Replacement of Tungsten Carbide Bushings Is Critical
Tungsten carbide bushings are crucial for ensuring the smooth functioning of mechanical systems.
However, improper removal and replacement can lead to damage to the bushing, housing, or shaft, which can compromise system performance and cause operational downtime.
Why Safe Removal and Replacement Matters:
Prevent Damage: Incorrect removal or installation can cause fractures or cracks in the bushing or surrounding components.
Maintain System Integrity: Ensuring that the bushing is properly installed prevents misalignment, excessive wear, and operational failures.
Minimize Downtime: Proper replacement procedures reduce the time it takes to restore equipment, minimizing costly downtime.
Tools and Equipment for Safe Removal and Replacement
Using the right tools and equipment is essential for safely removing and replacing tungsten carbide bushings. The following tools are recommended for the job:
1). Key Tools for Removal and Replacement:
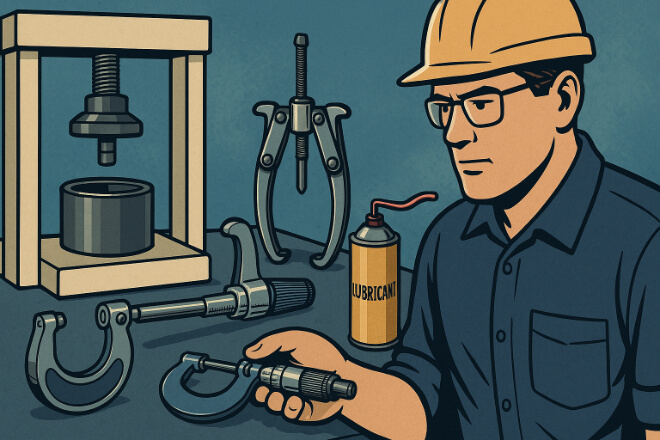
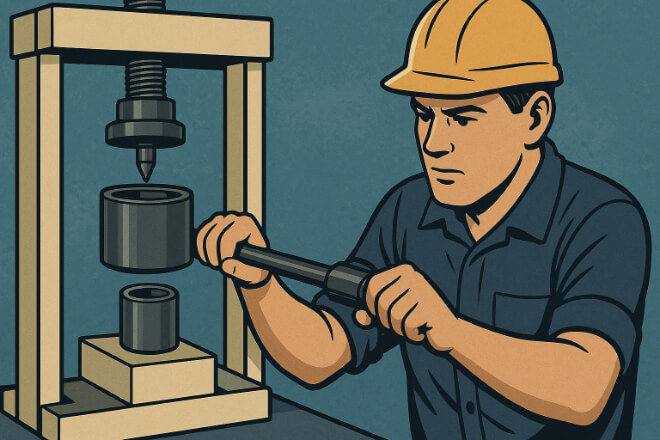
Hydraulic Press: A hydraulic press is used to apply controlled pressure when removing or installing bushings, especially those with tight fits.
Pullers: Pullers are used to safely extract the bushing from its housing without causing damage to the bushing or surrounding components.
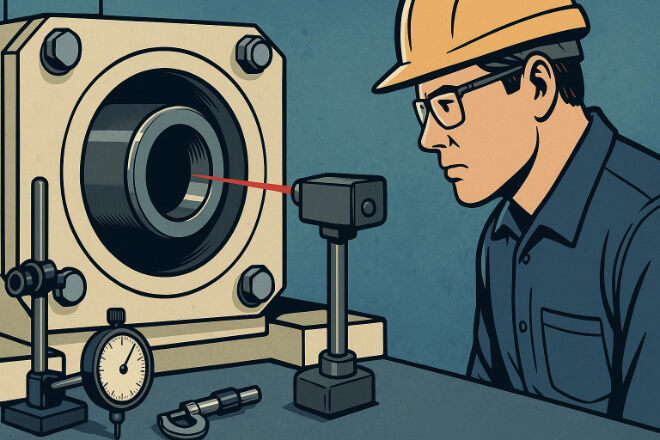
Micrometers and Calipers: These tools are used to check the dimensions of the bushing and ensure the correct fit during replacement.
Heat Gun or Oven: If the bushing is press-fit, applying controlled heat to the housing can help loosen the fit and make removal easier.
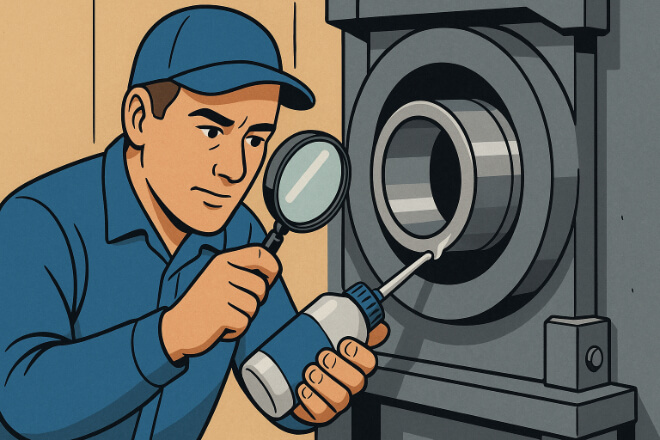
Lubricants: Use appropriate lubricants during installation to ensure a smooth fit and prevent friction-related damage.
2). Safety Equipment:
Gloves: Wear heavy-duty gloves to protect your hands from sharp edges and hot components.
Safety Glasses: Protect your eyes from debris or contaminants during the removal process.
Protective Clothing: Ensure you wear appropriate work attire to avoid injury.
Step-by-Step Guide to Removing Tungsten Carbide Bushings
Proper removal techniques are essential to avoid damaging the bushing or the surrounding equipment. Follow these steps for a safe and effective removal process:
Step-by-Step Removal Process:
Shut Down the System: Before starting, make sure that the system is turned off, and all energy sources are disconnected to prevent accidental starts.
Remove Any Surrounding Components: If necessary, remove any components around the bushing to access it easily.
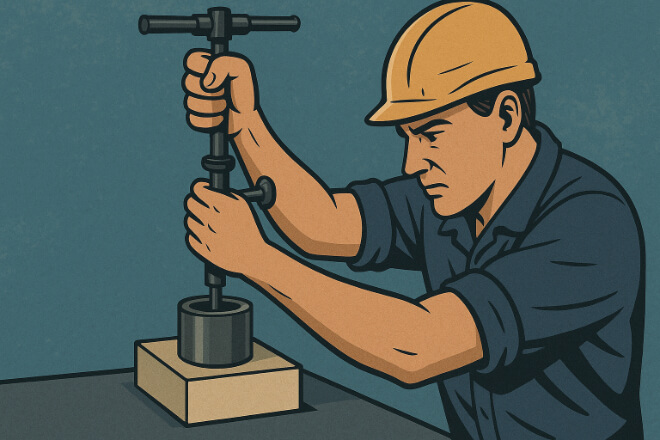
Use a Puller or Hydraulic Press: If the bushing is tightly installed, use a puller to gently remove it. Alternatively, use a hydraulic press to apply even pressure and push the bushing out of its housing.
Apply Heat if Necessary: If the bushing is press-fit tightly, apply heat to the housing (not the bushing) using a heat gun or oven to expand the material and make removal easier.
Inspect the Housing: Once the bushing is removed, inspect the housing and shaft for any wear or damage before installing the new bushing.
How to Safely Install Tungsten Carbide Bushings
Once the old bushing has been removed, follow these steps to ensure the new tungsten carbide bushing is installed safely and securely:
Step-by-Step Installation Process:
Clean the Housing and Shaft: Ensure that both the housing and shaft are clean and free of debris or old lubricant. This ensures a smooth fit for the new bushing.
Check the Dimensions: Measure the bushing and the housing to ensure that the new bushing fits within the specified tolerances.
Lubricate the Bushing and Housing: Apply a thin layer of lubricant to the bushing and housing to reduce friction and ease installation. Use the appropriate lubricant for the specific application.
Use a Hydraulic Press or Installation Tool: Align the bushing carefully with the housing, and use a hydraulic press to install it with even pressure. Apply the force gradually to avoid damage.
Check Alignment: Once the bushing is installed, check its alignment to ensure it fits correctly. Misalignment can cause uneven wear and reduce the lifespan of the bushing.
Allow Time to Settle: If heat was applied during installation, allow the assembly to cool before restarting the system.
Common Issues to Watch for During Removal and Replacement
During the removal and replacement of tungsten carbide bushings, certain issues can arise. Being aware of these potential problems can help you avoid damage and ensure a smooth process.
Common Issues:
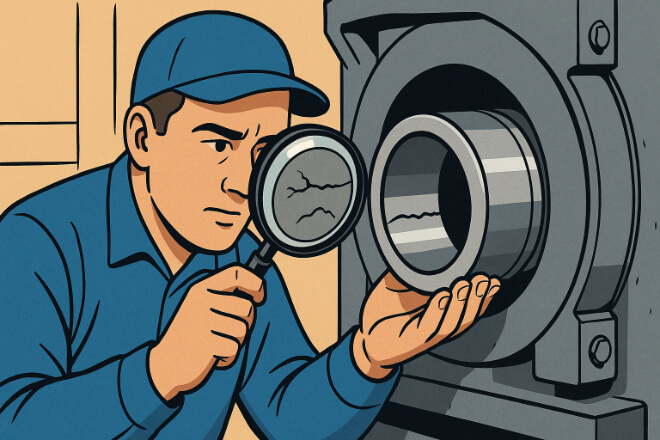
Cracking or Chipping: Improper removal or excessive force can cause cracks or chips in the bushing. Always apply even, controlled pressure.
Misalignment: Misalignment during installation can lead to uneven wear and premature failure. Ensure the bushing is aligned properly before applying pressure.
Overheating: Applying excessive heat during removal or installation can cause thermal damage to the bushing or housing. Monitor the temperature carefully to avoid this.
Inadequate Lubrication: Insufficient lubrication during installation can cause friction-related damage. Ensure that the bushing and housing are adequately lubricated.
Best Practices for Maintaining Tungsten Carbide Bushings
To ensure the longevity of your tungsten carbide bushings, regular maintenance and proper handling are key. Following best practices can extend the life of the bushing and prevent future issues.
Meilleures pratiques :
Regular Inspections: Periodically check the bushing for wear or damage. Look for signs of cracks, chips, or unusual wear patterns.
Lubricate Regularly: Ensure that the bushing is lubricated as needed to reduce friction and wear.
Monitor Operating Conditions: Keep track of the operating temperature, pressure, and speed to ensure the bushing is within the recommended range.
Replace When Necessary: If the bushing shows signs of excessive wear or damage, replace it promptly to prevent failure.